
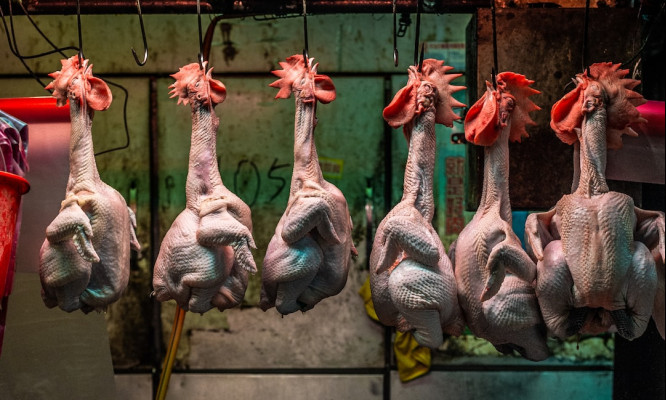
How do you butcher a chicken at home?
Fast the bird for at least 24 hours first, then kill humanely using a killing cone and a clean cut to the jugular. Scald the carcass in 140°F water to loosen feathers, then pluck. Remove the head and feet, eviscerate carefully to avoid puncturing the intestines, and rinse thoroughly with clean water. Chill to below 40°F as quickly as possible, dry, then bag for refrigeration or freezing. The whole process takes 20 to 40 minutes per bird once you have a routine down.
When I was around 12 years of age, my father brought home ten chickens that had stopped laying. Being a thrifty fellow, he thought it would be a good idea to put these birds in the freezer to feed the family as the occasion arose. He put the birds on a chopping block and, one by one, he began lopping off their heads. The headless chickens hopped around the yard for 30 seconds, or so, before they finally stopped moving. It was a wild thing to see, and an experience that I’ll never forget.
That was old-school butchery. Home processing doesn’t have to look like that. There are tools and methods that are cleaner, more controlled, and considerably more humane, and once you’ve done it a few times, the process becomes straightforward.
This article picks up where the meat bird raising guide left off. If you haven’t read that one, it covers everything from brooding through harvest weight.
Tools You Will Need.
Get these together before processing day. Running short of something mid-process is not a good situation.
Pruning shears — Helpful for cutting through the neck bone cleanly when removing the head. matter, in a safe and relatively humane way:
A sharp boning knife is used for the kill cut, removing the head, and evisceration. Sharp matters here; a dull knife makes every step harder and less precise.
A killing cone holds the bird inverted and still during the bleed-out. This is the single biggest improvement over the old chopping block method. It keeps the bird calm and contained, controls the blood flow, and prevents the frantic movement that would make a mess of the whole process.
A scalding tank is a large pot or dedicated scalder that holds enough water to fully submerge the bird. Needs to hold a steady 140°F.
A thermometer for monitoring water temperature during scalding. Guessing doesn’t work here.
A hose with running water You’ll use it throughout. There is a lot of blood and fluid involved; access to water is not optional.
A clean butchering table provides a solid surface that’s easy to rinse down.
Heavy garbage bags for feathers, offal, and anything else you’re not keeping. Remove waste immediately and keep the work area clean.
A large cooler packed with ice quickly chills finished birds. This is food safety, not optional.
The Fasting, Killing/Bleeding, Scalding, and Plucking
Step 1: Fast the Birds
Killing is not the first step; fasting is. Withhold feed for a minimum of 24 hours before processing. This clears the crop and digestive tract of food material, significantly reducing the risk of contamination during evisceration. A full crop or intestines make the gutting step messier and riskier.
During the fast, keep the birds in a wire cage raised off the ground so they can’t pick at litter or droppings. Provide fresh, clean water throughout. Hydration actually helps flush the system.
Do not skip this step. It’s one of the most important things you can do for a clean, safe end product.
Step 2: Kill and Bleed
Place the bird head-first into the killing cone. The cone holds it inverted and still, keeping it calm and giving you control.
With one hand holding the head steady, use your boning knife to cut the jugular vein just behind the earlobe on one side of the neck. Make a firm, confident cut about two inches long, applying enough pressure to cut cleanly without having to repeat it. A clean cut means a faster, cleaner bleed-out and a calmer end for the bird. Don’t worry. You’ll get better at it with practice.
Allow up to a full minute for the bird to bleed out completely. Don’t rush this step. A thorough bleed-out improves meat quality and keeps the carcass cleaner for the next steps.
Step 3: Scald
Scalding water needs to be at 140°F (60°C). Use a thermometer because this temperature is specific. Too cool and the feathers won’t release. Too hot and you’ll start cooking the skin, which tears during plucking.
Submerge the bird fully in the scalding water for two to three seconds, then lift it out for a few seconds. Repeat two or three times, moving the carcass around each time to make sure hot water reaches all areas, including under the wings and around the legs.
After the second or third dip, test a patch of feathers by pulling. If they come out with light resistance, you’re ready to pluck. If they’re still holding tight, go back in for another dip.
Step 4: Pluck
Work quickly while the carcass is still warm. Feathers release much more easily when the skin is hot. Pull feathers in the direction they grow, using firm, steady pressure. Work in sections: breast, back, wings, legs, neck.
Plan on five to ten minutes per bird when you’re starting out. You’ll get faster with practice and develop your own efficient sequence.
A few finishing details:
- Pin feathers are small, immature feathers that haven’t fully emerged. Grip them between your thumb and the flat of a knife blade and pull.
- Hairs are fine filaments left after plucking. Run a lighter or kitchen torch briefly over the carcass to singe them off. Work quickly and keep the flame moving to avoid scorching the skin.
Step 5: Remove Head and Feet
Now you have a plucked bird with head and feet still attached. Both come off before evisceration.
Feet: Locate the joint that bends backward, which is the hock joint. Insert the tip of your knife into the joint and cut through. This joint separates cleanly with minimal effort if you find the right spot. Don’t try to cut through bone.
Head: Cut through the skin and meat as close to the body as possible. The neck bone itself is easiest to get through with pruning shears. Cut through any remaining skin to finish.
Step 6: Eviscerate
This is the step that requires the most care. The goal is to remove all internal organs without puncturing the intestines, gallbladder, or vent, any of which can contaminate the meat.
Work through it in order:
- Lay the bird on its back on your clean table.
- Pinch the skin just above the vent and make a shallow horizontal cut through the skin only. Not deep enough to puncture anything underneath.
- Carefully extend the opening enough to get your hand inside the body cavity.
- Reach in with a cupped hand and, if possible, scoop out the entrails in one motion, pulling toward the vent end. Keep the movement controlled.
- Locate the windpipe (trachea) running along the inside of the neck cavity and pull it free. The connected organs will follow.
- Return to the vent end. Using your knife, carefully cut a V-shape around the vent, going just deep enough to free it from the surrounding tissue. The goal is to remove the vent completely and intact. Do not puncture it.
- Remove the vent and any remaining connected tissue.
If you want to save the heart, liver, and gizzard (giblets), set them aside immediately in a clean bowl. The liver should be removed carefully as it can be fragile; avoid nicking the gallbladder attached to it (it’s small and green. If it ruptures, rinse that area thoroughly).
Once the cavity is clear, rinse the entire carcass inside and out with clean, cold potable water.
Step 7: Chill
Get the bird’s internal temperature below 40°F as quickly as possible. This is the critical food safety step. The faster you chill it, the safer and of better quality the meat will be.
Two methods work well:
- Ice bath: Submerge the bird in a large cooler packed with ice and cold water. Most birds will reach temperature within an hour.
- Cold water rinse: Run cold water continuously over the carcass until it reaches ambient water temperature, then transfer to ice.
Once chilled, remove from the cooler and allow to drain and dry on a clean rack for about 20 minutes.
Step 8: Bag and Store
Bagged birds can go straight to the refrigerator or freezer. A few notes:
Many processors recommend letting the meat rest in the refrigerator for 24 hours before freezing. It allows the muscles to fully relax after processing, which improves texture.
Refrigerated fresh chicken is best used within two to three days.
For freezing, use heavy-duty freezer bags or vacuum seal (Amazon affiliate link) if you have the equipment. Remove as much air as possible to prevent freezer burn.
Label bags with the date.
The Bigger Picture
Home chicken butchering was common knowledge for most of American history and has largely disappeared in the last few generations. Most people today have no direct connection to how the chicken on their plate got there.
When you process your own birds, you know every part of that story. How they were raised, what they ate, how they were handled, and how they were processed. That’s not a small thing. The difference in quality between a fresh, home-processed bird and a grocery-store chicken is real and noticeable.
It takes a little getting used to, but the process is straightforward, and the payoff is worth it.
Thanks for reading. Please let me know if you have any questions.
Dave
Chickenmethod.com