Mites, lice, coccidiosis, Marek’s disease, fungi, mold, bacteria, and on and on, ad infinitum… What do you do about all of these problems?
I prioritize creating a safe and hygienic environment for my flock. A clean chicken coop isn’t just about aesthetics; it’s critical for the health of my chickens. Diseases can spread rapidly through a dirty coop, which is why I have developed a methodical approach to maintaining a healthy space for my chickens.
Stages
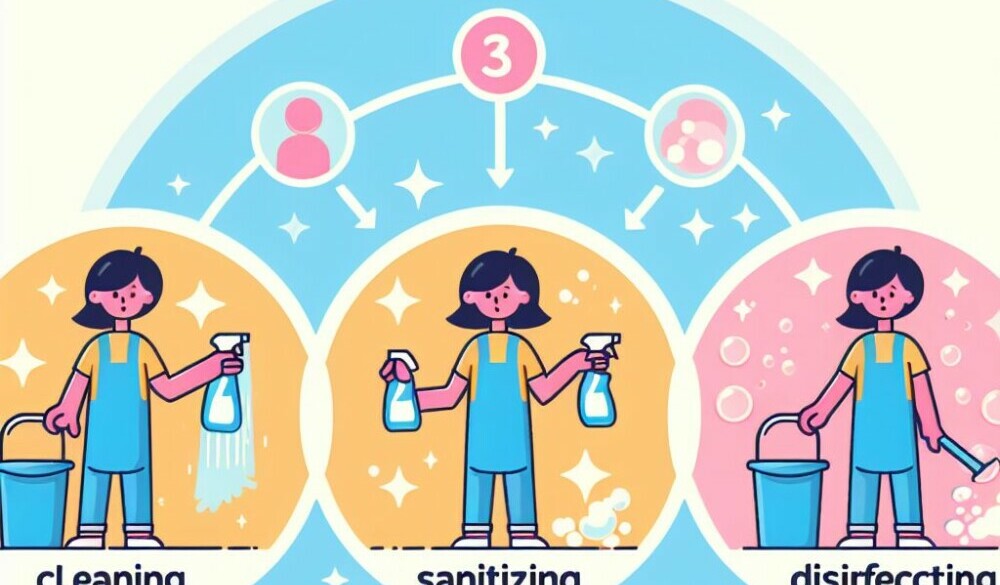
The process of disinfecting a chicken coop typically involves three stages: cleaning, sanitizing, and disinfecting. Cleaning removes dirt and manure; sanitizing reduces bacteria; disinfects targets and eliminates pathogens. I always aim to be thorough in each stage to protect my chickens from diseases that can thrive in unhygienic conditions.
I will discuss a variety of disinfectants — ranging from widely used chemicals like chlorine bleach and sodium hypochlorite to more natural alternatives such as vinegar and citric acid. It’s important to understand the nuances and safety measures required when handling these solutions to ensure not only a clean coop but also the safety of both the chickens and anyone applying the disinfectants.
One of the benefits of having several disinfectants in your arsenal of products is having the option to use one for the nesting box and another for the feeder and waterer. Maybe you are not comfortable using sodium hypochlorite in your feeder. The good news is you can use vinegar instead.
Preparing for Disinfection – A Thorough Cleaning
Before I even think about disinfecting my chicken coop, I ensure it’s thoroughly cleaned. This involves more than just a quick sweep; it requires attention to detail.
First up, I remove all bedding and debris. This clears space for cleaning and removes a significant chunk of bacteria and parasites that often hide in these materials.
I continue by scrubbing all surfaces vigorously. Coop walls, floors, and even nesting boxes need a good scrub to remove the organic matter that disinfectants would otherwise struggle with.
It’s crucial to focus on feeding and watering equipment as well. These are high-contact areas that can harbor salmonella and other harmful germs. And while we’re at it, don’t forget about your incubators and brooders. They also need to be sanitary to ensure healthy chickens right from the start!
Once the scrubbing is done, I wash everything down with water. Using a pressure washer or hose can be particularly effective in getting rid of residue left after scrubbing.
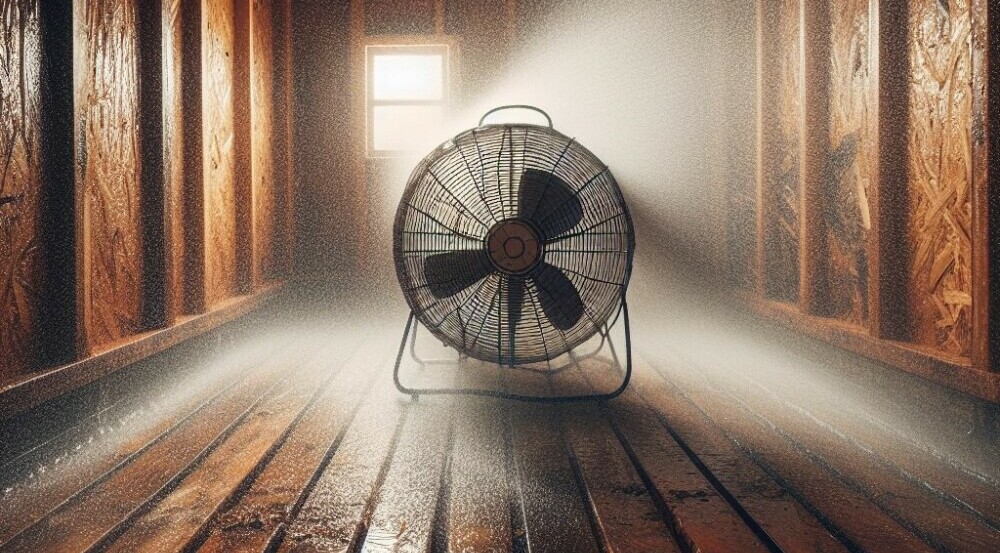
But here’s the part many might miss: drying. I always ensure the coop is completely dry before moving on to sanitizing and disinfecting.
Moisture can dilute disinfectants and reduce their effectiveness, so I never skip this step.
Pick a dry, warm, sunny day to do your cleaning. A gentle breeze helps to move the air to speed up evaporation time, or a Lasko fan can help dry your coop and accessories.
Sanitizing Your Coop Before Disinfection
Before I introduce the heavy hitters in coop cleaning, I need to clarify a crucial step: sanitizing. Sanitizing and disinfecting are not the same. Sanitizing reduces the number of bacteria to a safe level, as judged by public health standards, but it doesn’t necessarily kill all viruses, fungi, or spores.
This step is vital because it makes the environment less hospitable to pathogens, setting the stage for more intense disinfectants to come in and do their job effectively.
Picture this: I’ve removed all visible dirt and scrubbed the coop well. Now, with a sanitizer, I’m lowering the number of germs to help prevent disease spread among my chickens. It’s similar to using an antiseptic wipe on a countertop before you pull out the bleach for a deep clean.
Specific sanitizers are designed for coops, but if you’re looking for a home remedy, a diluted vinegar solution does a fair job for this step.
Remember, though, that vinegar won’t kill everything. The power of chemical disinfectants comes in items like chlorine bleach and other products I’ll soon discuss, which are waiting in the wings. They’re stronger and more ruthless against germs. They don’t just reduce; they aim to eliminate.
Now, it’s important that I tell you I don’t just splash the sanitizer around willy-nilly. I make sure to follow the manufacturer’s instructions for the right concentration and contact time.
This step ensures that the preparation is not in vain and the disinfection to follow will hit the mark. By taking care now, I’m ensuring the process is as effective as it should be, keeping those chickens safe from disease.
Navigating Chemical Disinfectants and Ensuring a Safe Environment
I’ll walk you through the strengths and cautions of using common chemical disinfectants. It’s important that you arm yourself with this knowledge to keep your chickens healthy and their environment safe.
For starters, chlorine bleach is widely regarded for its strong disinfectant properties. I use a diluted solution of chlorine bleach, specifically, a concentration of sodium hypochlorite. It’s a powerful choice that can wipe out a wide variety of pathogens, provided it’s used correctly and rinsed thoroughly to prevent harmful residues.

Another ally in the disinfecting arsenal is chlorine dioxide. I’ve found it to be effective, especially in killing bacteria and fungus, and it’s less corrosive than bleach, meaning it’s gentler on the coop materials.
Natural options such as vinegar and citric acid may appeal to those seeking a more environmentally friendly route. Though they offer a milder level of disinfection, I appreciate that they can still be useful against certain germs if used in higher concentrations or more frequently.
I also take care to handle iodine, phenols, and quaternary ammonium compounds (quats) with respect to their potency. These chemicals have different effective spectrums, and I always consult the label for the proper dilution rates to avoid harming my chickens.
Safety is critical. I ensure that any disinfectant I choose is appropriate for use in poultry housing and correctly labeled for the specific pathogens I’m targeting.
Proper ventilation is essential during and after application, and I follow up with a thorough rinsing, if recommended, to ensure no harmful residues linger.
Never mix chemicals. Some combinations are lethal.
Before applying any chemical disinfectant, I put on protective equipment like gloves and a mask. Cross-reference the manufacturer’s instructions with expert poultry care guidelines to avoid conflicts.
Remember, a well-informed approach not only cleans your coop but also protects your health and your chickens’ health.
Ensuring Long-Term Coop Health After Disinfection
Maintaining a clean and disease-free chicken coop doesn’t stop once the disinfection process ends. Regular follow-up is crucial to safeguard the health of your flock. Let’s talk about the steps you should take after disinfecting your coop.
First, it’s important to adhere to a routine. Establish a schedule for cleaning, sanitizing, and disinfecting your coop. This will prevent the accumulation of harmful pathogens that can threaten your chickens’ well-being.
Next, assess and repair any structural issues that might have been revealed during cleaning. Holes, gaps, and cracks can harbor pests and diseases. Address these issues promptly to maintain the integrity of your coop.
Also, consider the coop’s environmental conditions. Proper ventilation is key to preventing moisture build-up, which can contribute to the growth of bacteria and fungi. Ensure that your coop has enough airflow to keep the environment dry and fresh.
Remember that prevention is always better than cure. Implement biosecurity measures like controlling access to the coop and using footbaths. These simple steps can significantly reduce the risk of disease transmission.
Lastly, always wear protective gear when handling disinfectants and during the cleaning process. Personal safety is as important as the health of your chickens.
In summary, disinfecting your coop is part of a broader commitment to responsible poultry care. By incorporating these post-disinfection practices, you’re not just cleaning – you’re actively contributing to a healthier, happier, and more productive flock.
As always, thanks for reading, and please leave any additional cleaning, sanitizing, and disinfecting tips below so other readers (and I) can benefit from your experience and knowledge.
Dave
Chickenmethod.com
How should sodium hypochlorite be used ? Should it be used without water or be diluted with water when using a one gallon bottle of sodium hypochlorite ?
Hi, Mike. It should be heavily diluted.
Sodium hypochlorite is a very powerful form of bleach at 12.5%. It will eat a hole in your jeans if you spill it on them, so please be very careful with it, using gloves, an apron, goggles and a mask in a well-ventilated coop. Chlorine gas is heavier than air so it sinks to the floor when using, but it’s still not good to breath it for a long period of time as your nose will become blinded by it in a few minutes. And never mix it with other cleaning agents unless explicitly directed to do so by product instructions.
To answer your question, two tablespoons of 12.5% sodium hypochlorite in a gallon of cold, not hot, water will disinfect whatever you want to sanitize. Hot water diminishes the strength of chlorine.
Contact times vary for different applications, but after a half hour in most applications, including immersion, you should be good-to-go.
I hope that answers your question. Let me know if you have any others. Have a good one, Mike!
Dave