
Not all soils are created equal. Some consist of too much clay, so drainage is too slow. Others are sandy, so they drain too quickly. Some are too silty, so the texture is not right. The best soil is 40% sand, 40% silt, and 20% clay.
Even if this blend is achieved, the soil’s ability to properly feed plant life and provide the support that roots, stems, and foliage need depends on the nutrients available in the soil.
Fortunately, easy composting methods can make your almost-perfect soil nutritionally balanced.
What Is Composting?
Composting is a process that speeds up microorganisms’ natural decaying of organic material. Compost improves soil aeration, water-holding capacity, structure, tilth (workability), and nutrient-holding capacity.
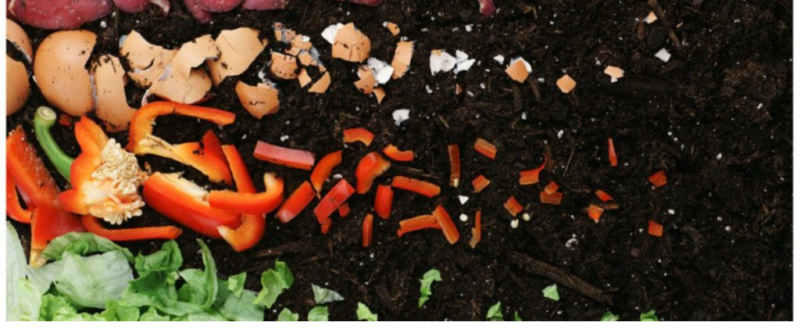
Another benefit of composting, especially in urban areas, is using vegetable scraps, aka leftovers, from your kitchen in your compost.
By doing so, less waste is sent to landfills. With the ever-increasing amount of waste sent to solid waste facilities, composting is a way to feel good about helping the earth.
Scraps such as vegetable matter, coffee grounds, and fruit gone bad can be used, but no meat or dog or cat manure. Fallen leaves and grass clippings are also good.
Meat is unsuitable for composting because it attracts unwanted critters and smells bad. Dog or cat manure can contain unhealthy pathogens and smell terrible, too. Odor from your compost pile or unit is a real bummer for your neighbors.
Easy Composting Steps

The first step is to choose a good site. Exposure to sunlight is essential. Although compost generates heat through bacterial decomposition, sunlight helps warm it, thereby speeding the decay process and helping to dry the pile. Your site should get at least six hours of sunlight each day. The area should also be in a well-drained section of your property and near a water source, so you can keep your compost moist. It should also be hidden so as not to be unsightly. Many container composters are not visually distracting at all.
The second step is to choose your container. Compost can be piled in a heap or placed in a fenced pen, cage, bin, barrel, or drum.
Whatever you choose, the perfect volume of material is one cubic yard, or three feet wide by three feet deep by three feet tall. This allows for appropriate heat generation by bacteria and adequate aeration.
Step three is choosing raw materials. Microbes break down the carbon in organic matter into usable nutrients for plants. These microbes must also have nitrogen to break down carbon. Green organic materials, such as grass clippings, manure, and garden waste, have a low carbon-to-nitrogen ratio and are easy for microbes to break down.
Brown organic materials such as sawdust, fine wood chips, straw, and dry leaves have a high carbon-to-nitrogen ratio and are a problem for microbes to break down. The ideal compost will be a mix of green and brown in a ratio of 2 parts brown to 1 part green. This will ensure the microbes have enough food (carbon) and nitrogen to help them decompose.
The fourth step is aeration. The “bugs” or bacteria in compost must have oxygen for healthy decomposition.
You have to turn or stir piles every week, or at least every two weeks, to ensure adequate aeration and to fold the outside edges of piles into the mix. Done right, compost can be ready in two to four months. If not turned, compost can take six months to 2 years to decompose.
On to step five… keep the pile moist. Just as microbes in the compost need air to breathe, they also need water to “drink.” Your potential soil is too wet if water can be squeezed out of a handful and too dry if it doesn’t feel moist.
If the compost pile is too dry, decomposition slows down. If it is too wet, air movement within the pile is restricted. Heat and evaporation will dry out the pile, so it needs to be kept moist, which is not hard to do if a hose is nearby.
In step six, you want to keep the compost’s internal temperature at about 140 degrees Fahrenheit.
The final and seventh step is to cure your compost. Now, you should have a dark, crumbly, earthy-smelling, warm, moist compost. It will still need a little time to gas off and decompose more. Let it sit for about a month, and you will have a fantastic soil amendment that your plants will thrive in.
Chicken Manure In Compost
Big chickens, little chickens; let’s talk about chickens.
Now that you know how to create your own compost, let’s talk about chicken manure as it relates to the two-to-one brown-to-green ratio described in step three.
Chicken manure is very green. It must be mixed as the “one” part of the two-to-one scenario. If you add chicken manure straight to your garden, you will probably burn your plants because chicken manure is very “hot.” It is very high in nitrogen, phosphorus, and potassium compared to most manures, like cattle, horses, sheep, or even deer.
The heat generated by chicken manure can be easily managed through proper composting.
Sharing With Neighbors
Chickens don’t lay eggs their entire lives. What they do create from day one to the end is manure. One chicken can make 8-11 pounds of manure every month. That is staggering.
By cleaning out your chicken coop regularly, you will be amazed at how quickly you can compost, and your chickens will appreciate the clean coop.
You can share your manure or compost with neighbors to make friends and reduce your copious bounty. Once they see the benefit of your garden gold, they probably won’t mind the constant crowing of your rooster.
Harvest Time
I hope you’ve enjoyed learning how to make compost in this article. It’s not that hard. Following simple steps and easy composting methods, you can grow sturdier plants and have fuller baskets at harvest time.
Thank you, and let me know if I can help.
Dave

Chickenmethod.com