
Proper ventilation during winter is crucial for keeping your chickens healthy and happy. It’s a bit more complex than just opening a window here and there. Having the right airflow prevents a range of issues, from frostbite to respiratory problems.
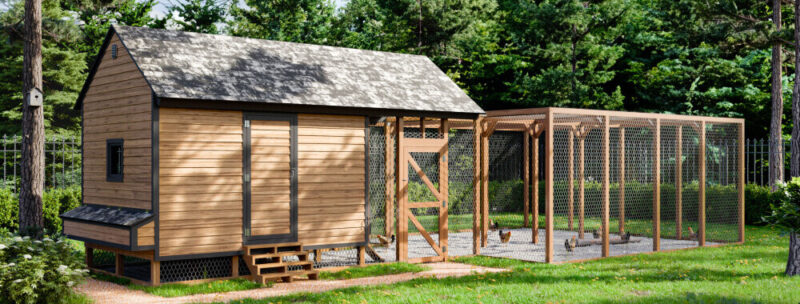
In the photo, you can see the perfect ventilation spot at the peak of the arguably perfect chicken coop. The plans for this coop can be found at Easy Coops.
Balancing warmth and fresh air is the key. Chickens must be warm enough to be happy and cold enough to be healthy. While they need a cozy environment, they also need fresh air to avoid moisture build-up, which can create a breeding ground for bacteria. Think of it as creating a breathable but insulated space.
Many think more ventilation equals colder chickens, but that’s not the case. Proper ventilation helps remove stale air, excess moisture, and ammonia from droppings without drastically dropping the temperature. It’s about intelligent airflow, not just more airflow.
How to Ventilate a Chicken Coop
We are talking about getting ventilation right in winter today. It starts with the placement and size of vents. You want vents higher up on the walls to let out the warm, moist air without letting in drafts at the chicken level. Think of it like having a bathroom exhaust fan that pulls out the steam without making the room icy.
Using adjustable openings is a smart move. These let you control the amount of airflow based on the outside temperature. On milder days, you can open them a bit wider, while on those frigid days, narrow them down. It’s all about finding that sweet spot where air moves without chilling your birds.
Materials matter too. Opt for weather-resistant, durable materials for your vents. Metal often works well, but make sure it won’t rust easily. Plastic can also be a good choice if it’s sturdy enough to withstand winter conditions. The goal is to have something that will last through rough weather without needing constant repairs.
Managing Moisture Levels in Winter Chicken Coops
Dealing with moisture inside the coop is vital. Too much dampness can lead to respiratory problems for your flock, and nobody wants that.
If you keep chickens, you know how dusty the coop can get, especially if a few chickens feel feisty. Bacteria, mold, and diseases flourish in warm, damp conditions. Kick up a little dust in the coop, and you kick up all the bad stuff, too.
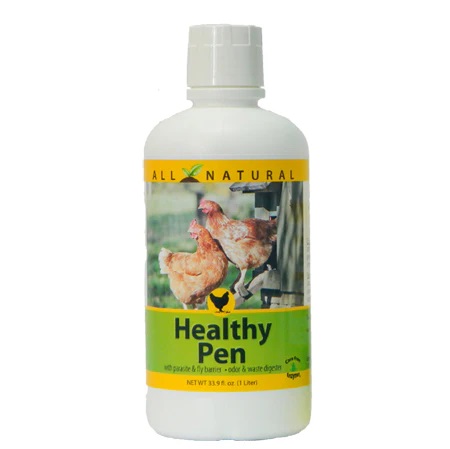
Cut down on parasites and such with a good coop spray. Poultry protector works well, and so does Carefree Enzymes Healthy Pen spray.
Keep an eye out for condensation on walls or the ceiling. If you spot any, it’s a red flag that your moisture control needs a boost.
Good drainage is your friend. Make sure water is flowing away from your coop and not pooling around the base. This helps keep the inside dry. If needed, create a slight slope around the coop’s perimeter to direct water away.
For an added layer of moisture management, consider moisture-absorbing materials inside the coop. Wood shavings work great for this purpose, as they help soak up excess dampness. Regularly changing them out keeps things fresh and dry.
Another clever trick is to use a droppings board. It catches poop before it hits the litter, reducing ammonia and moisture. Scrape it clean daily, and you’ll notice a big difference in overall coop dryness.
I’ve mentioned in other articles that it’s a good idea to keep a compost heap near the coop. They are the perfect spot to empty your “poop board”.
Maintaining a Healthy Coop Floor Throughout Winter
Winter bedding is crucial for keeping the coop both warm and dry. Straw and pine shavings are top choices, providing insulation and absorbing moisture. Steer clear of materials like hay, which can get moldy and damp quickly.
Regular cleaning and upkeep go a long way. Even in cold weather, keeping the coop clean helps prevent the buildup of moisture and ammonia. Aim for a weekly clean-out, removing wet or soiled bedding and replacing it with fresh materials.
The deep litter method is a fantastic way to manage the coop floor. This involves adding layers of fresh bedding on top of the old, creating a composting effect that generates heat. Just make sure you turn the litter regularly to keep it aerated and functioning properly.
Don’t forget to check for drafty spots around the floor level. Even with good bedding, drafts can create cold pockets that aren’t ideal for your chickens. Seal up any gaps but keep the overall ventilation in mind.
Take care.
Dave

Chickenmethod.com