Let’s talk about incubators for hatching baby chicks. You can find them for sale online or at retail stores. They’re inexpensive, quite expensive, and somewhere in between. The price difference usually reflects the features and the quality of construction that goes into each unit. If you’ve had chickens for a while and don’t want to go to the farm store to buy new baby chicks in the spring, you might want to try hatching your birds. So, what is the best egg incubator for beginners?
DIY Low Cost Incubator. Low/No Cost
The least expensive way to obtain an incubator is to build one yourself. You probably have the materials needed already. The potential little bundles of joy need heat and humidity, and eggs should be turned regularly on a schedule that you can accommodate so that the chicks don’t get stuck to the shell as they grow.
The ideal temperature to incubate eggs is 38 degrees Celsius – that’s 100.4 degrees Fahrenheit. Humidity must be between 25%-65% for 18 days and 70% for the last few days of incubation.
Temperature and humidity control are crucial to a successful hatch. Keep a pan of water in your DIY incubator, and don’t let it go dry. Measure the temperature of the incubator about a quarter of an inch from where the egg touches the floor of your unit. – that’s where you want the bulb of your thermometer when measuring.
Okay – Now let’s learn…
How to Build Your Incubator
What you need is a box into which you can secure an incandescent light bulb, a thermometer, a pan of water for humidity, some window screen, 1×2 pine or sticks from outside to tack your screen to, and some fertile eggs.
Get a box that is approximately ten inches cubed (10x10x10). Anything close will do. Fashion a frame out of your sticks or 1×2 to fit inside the bottom of your box.
Tack your screen to the frame. The screen keeps the eggs off the floor and allows the eggs to breathe. It also provides a surface for the chicks to walk on after they hatch.
Put your pan in the bottom section of the box and lay the screen over the pan. You’ll fill the pan through the screen. Set your light up. To do this, you can lay a small lamp on its side and poke the socket through the side of the box. Just make sure you don’t set your box ablaze.
Now, you can get a hygrometer to monitor your humidity or ensure that your pan always has water in it. The bigger the pan, the higher the humidity.
This incubator will work. Eggs must be turned several times daily to keep the embryo from adhering to the shell wall as it grows. Turning mimics what a hen does to her eggs in the nesting box. Many turn the auto-turner in their incubators off during the last few days of the incubation period to keep the chicks from getting stuck in their shells.
Hens stop turning eggs when chicks start peeping, typically around day 18.
Buying an Incubator. Bells and Whistles.
If the DIY incubator is not exactly what you had in mind, then there are brands and types that you can choose from, depending on your goals. There are a couple of considerations that you might want to understand before you decide to incubate eggs.
Once your little darlings hatch, and they will, they’ll need a safe and warm place to stay for a while before they can mingle with your flock, the big birds, and the bullies.
Baby chicks are fragile. They can be crushed in an instant by accident should your dog decide to play with them. They need to stay warm. Chicks won’t have their feather coats for 5-6 weeks of age. Even then, they should only go out when it’s warm. So you will need a brooder – another topic for another time.
Incubators come in sizes and with options for all, from elementary school science classes to commercial hatcheries. If you want six birds or 60, there is an incubator.
Some are bare-bones with heat and a thermometer only. Some have digital readouts that tell you the temperature and humidity, turn your eggs for you, and adjust the humidity according to the time of the hatching cycle. I have such a unit. It’s amazing. It cost $130.00. I went 8 out of 9 in my last hatch.
A fully automated tabletop incubator can cost up to a thousand dollars. That’s totally unnecessary for a backyard application. A $100-$500 incubator will get you all the eggs you need. My $130.00 model holds 48 eggs.
I highly recommend getting a model with temperature and humidity readouts and an automatic egg-turner. It will save you a lot of worry over the 21-day waiting period.
Two Reviews
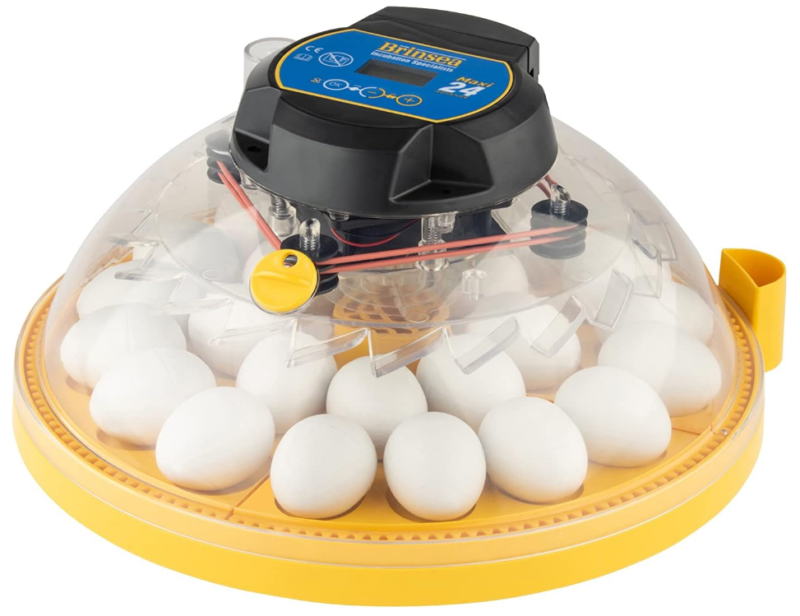
I took a look at two incubators. They are similar in capacity and features. The Brinsea goes for $232.00 at Amazon and Chewy. I couldn’t find anyone who had anything bad to say about this incubator. I’m seriously thinking about picking this one up. It’s a great size and does everything for you except add water. It also has a 3-year warranty subject to registration.
Brinsea Maxi 24 Advance Automatic 24 Egg Incubator

- Clear walls mean excellent visibility of the egg chamber without lifting the lid.
- It can hold 24 chicken eggs or 12 larger eggs.
- A flexible, mix-and-match egg quadrant insert system with two sizes of inserts is included!
- Enjoy the ease of digital, menu-driven controls with temperature alarms, temperature displays, and a countdown to hatch.
- It features a programmable automatic egg turning with auto-stop.
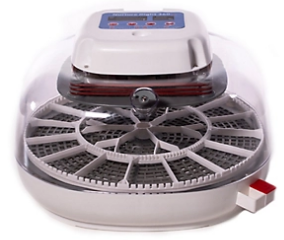
This one is from Harris Farms. It has good reviews. Some people complained that it had some problems, but it is a nice unit for $174.00 at Tractor Supply.
Harris Farms 22-Egg Capacity Nurture Right 360 Egg Incubator

- Auto-stop: Nurture Right 360 incubator will stop turning eggs three days before hatch day
- Automatic egg turner: Eases the incubation process and helps stimulate hen hatch for a higher hatch rate
- 360 visibility: The clear top on the incubator makes it great for educational observation
- 360-induced airflow: Nurture Right 360 incubator provides optimal air circulation & temperature stability
- 22 egg capacity: Easy-to-use incubator can hold up to 22 chicken eggs, 12-18 duck eggs, and 22-24 pheasant eggs
The Best Choice is…
The one you make. The best egg incubator for beginners is the one that fits their needs. Only you can decide your price cap or your flock size goals.
Just a couple of quick items before I let you go: I will answer some commonly asked questions.
- Best egg incubator to buy: The best incubator depends on your specific needs, such as the number of eggs you want to hatch, your budget, and whether you prefer manual or automatic controls. Popular brands include Brinsea, HovaBator, Janoel, and Rcom, among others. It’s essential to read reviews and consider factors like temperature control accuracy, humidity management, and ease of use.
- Running an incubator before putting eggs in. Running your incubator for at least 24 hours before placing eggs inside is recommended. This allows you to stabilize the temperature and humidity levels and ensure the incubator functions correctly.
- Chicken eggs hatching at 90 degrees: The optimal temperature for incubating chicken eggs is around 99.5 degrees Fahrenheit (37.5 degrees Celsius). Sustained temperatures significantly higher or lower than this can reduce hatch rates or cause developmental issues in the embryos. 90 degrees Fahrenheit (32.2 degrees Celsius) is too low for successful incubation of chicken eggs.
- Success rate of egg incubators: The success rate of egg incubators can vary based on factors such as the quality of the incubator, the consistency of temperature and humidity control, and the experience of the user. Generally, with proper setup and management, egg incubators can achieve hatch rates of 70-80% or higher for chicken eggs. Factors like egg quality, breed, and handling during incubation also influence success rates.
If you’re considering incubating eggs, it’s crucial to follow the manufacturer’s instructions closely and monitor conditions regularly to maximize hatch rates.
Some, if not all, of your chicks will hatch. When this happens, you will have to consider the next steps. I have written numerous articles about raising chickens, and you can look through my categories at the top of the page to find them, but for now, I will tell you that you will need a brooder to raise your chicks in because you can’t leave them in the incubator.
Once they leave the brooder, they will need a chicken coop with nesting boxes, a feeder, a waterer, roosts, and more. I’m not trying to scare you off or dissuade you from hatching chicks. You just need to be prepared for your little balls of fluff to grow up.

Thanks for reading my post. Take good care of yourself.
Dave

Chickenmethod.com

